A Beginner's Guide to Building Your First WebApp
Dev

Embarking on the journey to build your first web application can be both exhilarating and intimidating. Whether you're a budding developer or someone with a keen interest in technology, creating a web app from scratch is a valuable and rewarding endeavor. In this beginner's guide, we'll break down the process into manageable steps, providing clear instructions and practical tips to help you navigate through the complexities of web development. From understanding the basics of programming languages to deploying your app for the world to see, this guide will equip you with the essential knowledge and confidence to bring your ideas to life.
Step 1: Setting Up Your Development Environment

Before you start building your web application, you'll need to set up your development environment. This includes installing the necessary software and creating a workspace for your project.
Install Node.js and npm
Node.js is a JavaScript runtime that allows you to run JavaScript on your computer. npm (Node Package Manager) is a package manager for JavaScript, allowing you to install and manage libraries and dependencies.
- Go to the Node.js website and download the latest version of Node.js for your operating system.
- Follow the installation instructions for your operating system.
- Open your terminal (Command Prompt on Windows, Terminal on macOS or Linux) and verify the installation by running the following commands:
node -v
npm -v
Set Up Your Project Directory
- Create a new directory for your project:
mkdir my-web-app
cd my-web-app
- Initialize a new Node.js project:
npm init -y
Step 2: Create a Next.js Application

Next.js is a popular React framework that enables server-side rendering and generates static websites for React-based web applications.
Install Next.js
- Install Next.js and React:
npm install next react react-dom
- Create the necessary files and folders:
mkdir pages
touch pages/index.js
Configure Next.js
- Open the
package.jsonfile in your project directory and add the following scripts:
"scripts": {
    "dev": "next dev",
    "build": "next build",
    "start": "next start"
}
Step 3: Set Up Supabase
Supabase is an open-source Firebase alternative that provides a backend as a service. It offers a hosted Postgres database with RESTful APIs and real-time capabilities.
Create a Supabase Account and Project
- Go to the Supabase website and sign up for a free account.
- Create a new project and take note of your API keys and database URL.
Install Supabase Client
- Install the Supabase client library in your Next.js project:
npm install @supabase/supabase-js
- Create a new file called
supabaseClient.jsin your project root and add the following code to initialize the Supabase client:
import { createClient } from '@supabase/supabase-js';

const supabaseUrl = 'YOUR_SUPABASE_URL';
const supabaseKey = 'YOUR_SUPABASE_KEY';
const supabase = createClient(supabaseUrl, supabaseKey);

export default supabase;
Create a Database Table
In the Supabase dashboard, go to the "Table Editor" and create a new table called todos with the following fields:
id(UUID, primary key)task(text)is_complete(boolean)
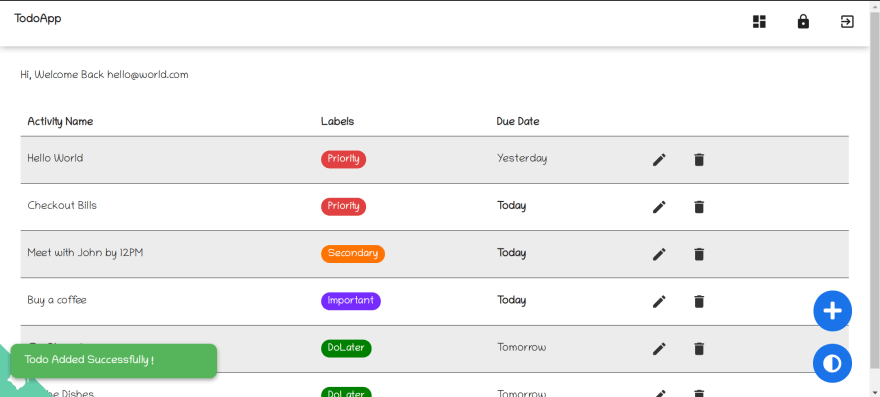
Step 4: Build the Todo Application

Now that your development environment and backend are set up, it's time to start building your web application. You'll use HTML, CSS, and JavaScript to create the user interface and functionality of your app. If you're new to web development, consider using TailwindCSS, a utility-first CSS framework, to style your application quickly and easily. TailwindCSS can help you create a visually appealing design without writing much custom CSS.
Begin by creating basic HTML for your app structure, adding CSS for styling, and using JavaScript to handle user interactions and connect to your Supabase backend. Focus on building a simple, functional application that you can refine and expand upon as you gain more experience.
Step 5: Deploy Your Web Application

With your application now functional, the final step is to deploy it so others can access it. Vercel is a popular platform for deploying Next.js applications quickly and easily.
Create a Vercel Account
Go to the Vercel website and sign up for a free account.
Deploy Your Application
- Connect your Vercel account to your GitHub, GitLab, or Bitbucket account where your project repository is hosted.
- Follow the prompts to import your project repository to Vercel.
- Vercel will automatically detect your Next.js project and configure the deployment settings.
- Click "Deploy" to deploy your application.
Verify Deployment
Once the deployment process is complete, Vercel will provide a URL where your live web application can be accessed. Visit the provided URL to verify that your application is live and functioning correctly.
Conclusion
Building your first web application may seem challenging, but by breaking down the process into manageable steps, you can create a functional and impressive web app. By setting up a robust development environment, utilizing powerful tools like Supabase and Next.js, and deploying your application with Vercel, you can build and share your project with the world. As you gain more experience and confidence, you can continue to refine and expand your application, adding new features and improving its performance. Happy coding!